AutoML for automating the process of building ML models
The lifecycle of a traditional machine learning (ML) project is iterative and includes several phases, including data cleaning and pre-processing, feature extraction and selection, model selection, hyperparameter tuning, model training, model validation and finally deployment.
The following diagram shows the phases of a typical ML project:

In general, when conducting an ML project, much of the time is spent on manual and repetitive tasks. For example, according to a Kaggle survey on the time spent on each of the tasks in a data science project, professionals spend on average 23% of their time on data cleaning and 21% on model selection and building.
What if there were tools that allowed us to automate many of these tedious tasks, such as searching for the model that best fits our data from the wide range of available algorithms? This is precisely where the increasingly popular automated machine learning (also called AutoML) comes into play.
As you can imagine, the benefits of applying automation in the ML process are innumerable, but its use is not always recommended.
In this article, we will explain what AutoML consists of and when it is advisable to apply these techniques. Finally, we will show step by step how to use the AutoML tool offered by Google to build a model that identifies whether the content of a tweet contains hate speech, offensive language or neither of them.
Let's start by explaining what it is about!
AutoML: using automation in ML
AutoML is the field of study that deals with methods that aim to automate various (or all) parts of the machine learning workflow, maintaining model quality.
For example, there are AutoML techniques that are responsible for data preprocessing, model selection, hyperparameter optimization or neural architecture search.
Needless to say, these tools can save a great deal of time, increase productivity by simplifying the process and, in some cases, achieve better models by reducing the possibility of errors that may occur in manual tasks.

Another great advantage of this type of methodologies is that they manage to democratize the development of ML models and allow users with little knowledge in the field to build customized and high-performance models.
But these tools are not only aimed at inexperienced users, as they also allow data scientists or experts in the field of ML to put aside some tedious tasks to focus on other more creative and interesting ones and thus improve their productivity.
However, as we have already mentioned, the use of this type of techniques is not recommended in all situations.
Firstly, it should be noted that, although AutoML makes it easier for non-expert users to develop ML models, a minimum of knowledge and experience is required to be able to create high-quality models.
Secondly, AutoML cannot perform all the responsibilities of a data scientist or machine learning expert, such as formulating the problem, interpreting the model and the results obtained, or extracting new variables from the raw data using domain knowledge, experience and creativity. Automation can simplify the work of experts, but it cannot replace them completely.
Having said that, let's take a look at some of the tools that allow us to automate the ML process.
Different AutoML tools and levels of automation
As a result of the rapid growth in recent years and the high demand for this type of techniques, many companies have created their own AutoML solutions, including Google Cloud AutoML, Azure Machine Learning by Microsoft, auto-sklearn, AutoKeras and Auto-WEKA, among others.
Among these solutions, there are some, such as Cloud AutoML, that cover practically the entire process of creating the model and, in addition, they are cloud-based. For example, Cloud AutoML Vision allows us, by simply uploading our labelled images and a couple of clicks, to train a high-quality image classification model that we can access via a REST API to generate predictions.
However, most of these solutions partially cover some of the phases of the process. For example, tools such as auto-sklearn, perform a search to find the best ML algorithm and also take care of automatically adjusting hyperparameters.
If you are looking for a more detailed and in-depth explanation of each of these solutions, we recommend reading this paper, where the authors carry out an exhaustive study of the state of the art in this field.
That said, the tasks that are normally automated with these tools are the following:
- Data pre-processing: AutoML tools can perform data cleaning and transformation of raw data into a valid format.
- Variable selection: elimination of redundant and irrelevant variables.
- Model choice and hyperparameter optimization: in this case they automatically choose the optimal model and its hyperparameters.
- Deployment of the model: some solutions allow us to deploy the model, for example, in the cloud, in order to generate predictions quickly and easily.
Using Cloud AutoML to identify hate speech and offensive language tweets
In this last practical section, you will learn how to use Google Cloud AutoML Natural Language to implement good models for text classification tasks. Our goal is to create a multi-class classifier capable of classifying tweets as one of three categories: hate speech, offensive language (but not hate speech), or neither offensive nor hate speech.
For this section, we will use the corpus provided via data.world website in CSV format by Thomas Davidson, which consists of a set of around 24k tweets labeled as hate speech, offensive language, or neither.
Below you can see a sample of 5 tweets with their corresponding classes:
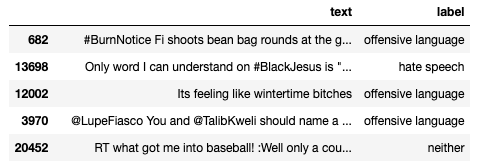
Before you start building your ML model, you need to create a Google Cloud account where you will be provided with 300 USD in free credit.
Once you are signed in with your Google Cloud Platform Console account (https://console.cloud.google.com/), select Vertex AI in the navigation menu and click on Dashboard.

To train the classification model with AutoML Natural Language, we must provide the text documents and the classification categories that apply to those documents.
The CSV file that we pass to the model as input must contain, in each row, a text document (tweet) and its corresponding class.
To upload our dataset to Google Cloud, click on CREATE DATA SET as shown in the following image:
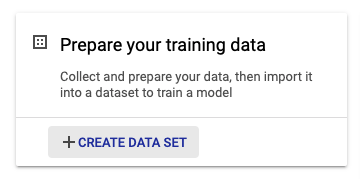
In the next section, you only have to select the type of data you will upload, the name of the dataset and the region. Once you have chosen everything, continue by pressing the CREATE button.

Now, choose an import method. In our case, we select the option Upload import files from your computer to select the CSV file with the tweets previously downloaded.
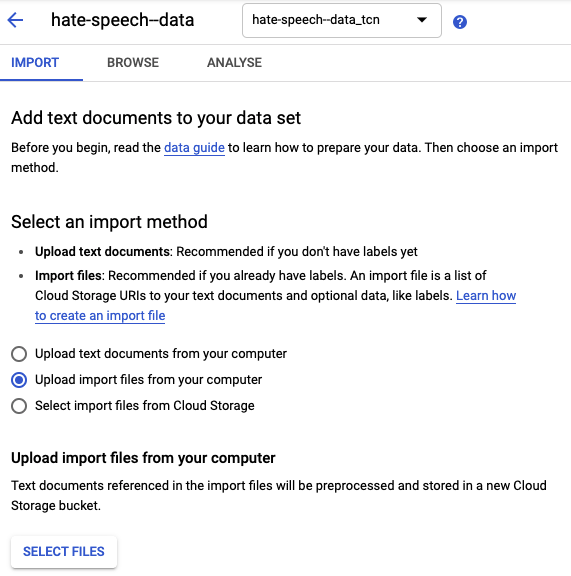
Next, you will need to select a Cloud Storage path where the data will be stored.

The import of data will take a few minutes to finish. Once imported, you should be able to see the correctly uploaded tweets along with their label as shown in the image below:
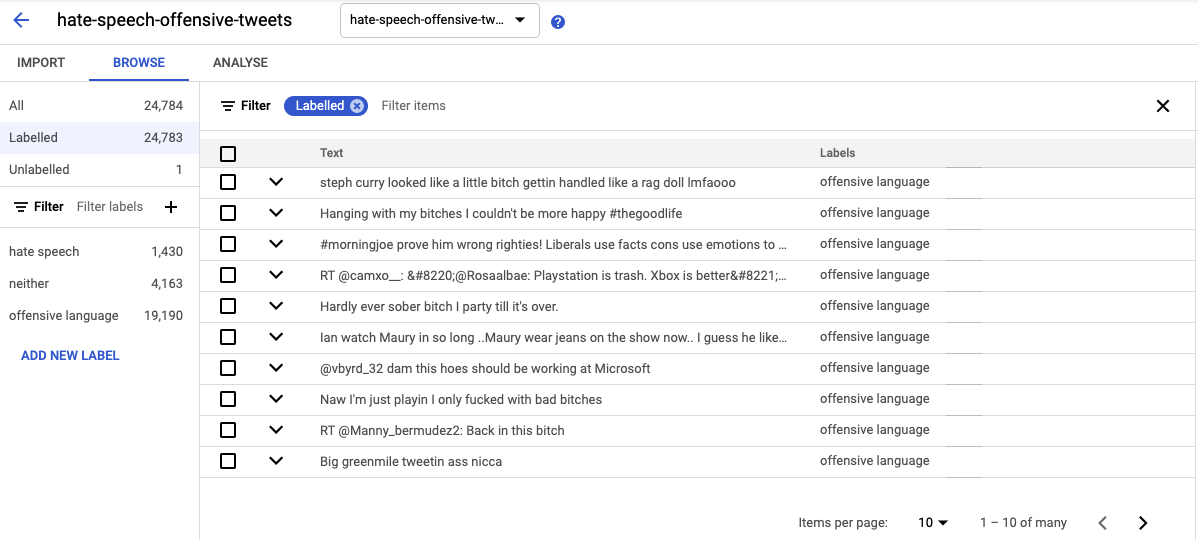
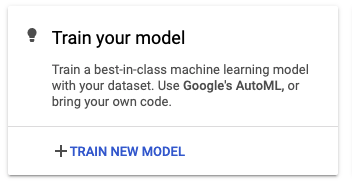
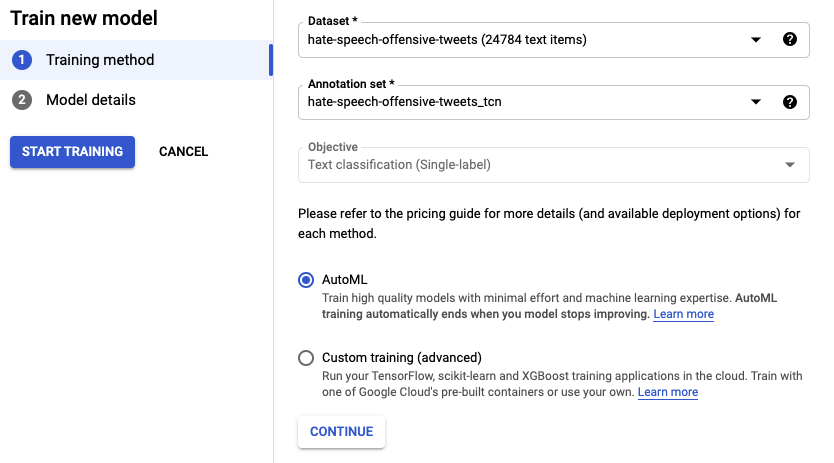
The next step is to train the classification model. To do this, we return to the Dashboard and click on TRAIN NEW MODEL.
Next, we only have to indicate the name of your model and then click on CONTINUE.
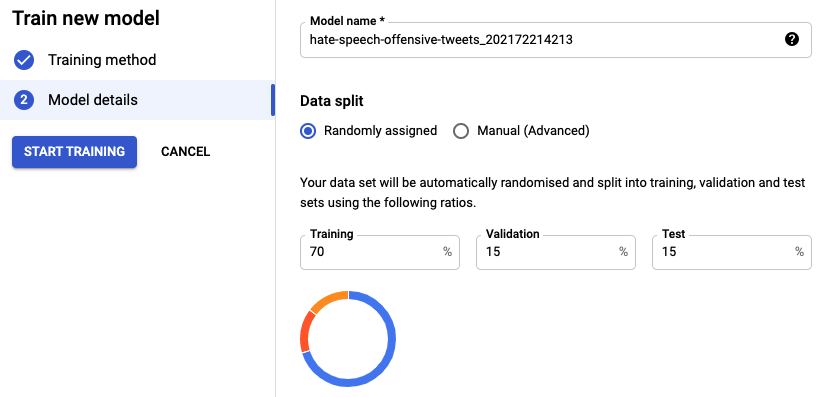
Besides, you can manually assign the percentage of samples used as training, validation and test set by changing the Data split option.
Now it is time to train the model! Click on START TRAINING to initiate the process of training the model.
After a few hours, you will receive an email again, this time to let you know that the model has finished its training.
Once the training is completed, you can go back to your model in Google Cloud Platform and see the training results in the EVALUATE tab.
First, the tool shows us a set of evaluation metrics (precision, recall, etc.) that indicate the model’s performance on the test data set.
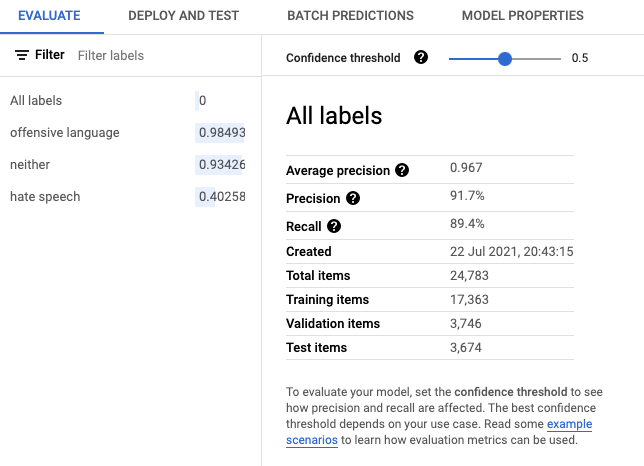
In this case, notice that our classifier achieved an average precision (at all possible thresholds) about 0.97. Not bad!
However, although it may seem an excellent performance at first glance, if we look at the confusion matrix, we can see that the classifier does not perform as well in predicting tweets belonging to the hate speech class.
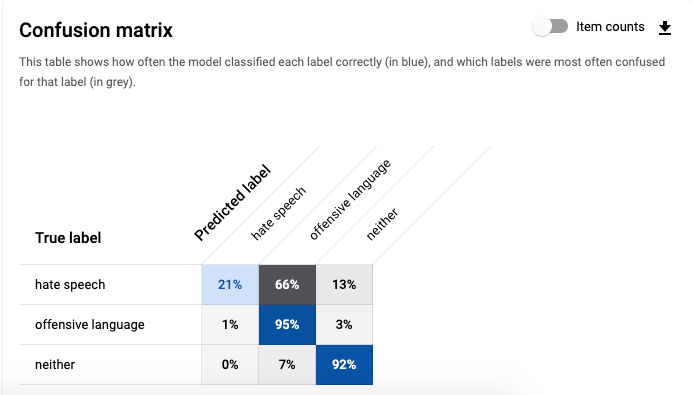
The model only correctly identifies hate speech label 21% of the time. This is because this class is under-represented in the dataset (only around 5% of the tweets are labelled as hate speech), so we can try adding more samples from this class.
You can even filter by class to see precision and recall metrics and samples of false negatives, false positives and true positives for each class as in the image below:

Finally, you can deploy and start using your model by selecting the DEPLOY AND TEST tab.
That's all for today. In this publication, we have learned what AutoML is and how to build a model with Cloud AutoML in a couple of hours to identify hate speech and offensive language tweets. We hope you found this tutorial useful and that it inspired you to create your models. See you next time!


